Showing posts with label crafts. Show all posts

Monday, August 1, 2016

Fun and Funky Planters

Man, it's hot out.  Almost hot enough to make me to ignore my garden.  I think I'll sit inside and blog about it instead;)

Remember my post early this summer on Instagram and Facebook with this year's version of my birdcage planter?

Just impatiens this year:)
I just remembered that I have another unorthodox planter I haven't shown you yet, one I made out of an ancient Ikea chair that had lost its seat:

Grass, Bells (suffering from the heat) and Sweet Potato Vine (loving the heat)
I'm not much for pink flamingos, but I do like a garden that has some quirkiness to it, and unusual planters are a great way to achieve that goal.  Here are a few more examples I'd like to try someday:

Wheelbarrow Planter
Wheelbarrow via Bob Vila
Broken bird bath? Plant it! | Birdbath planter with petunias
Birdbath via Empress of Dirt

Planted Truck ready to go.
Toy Truck via Junk Market Style (I have one just like this!)
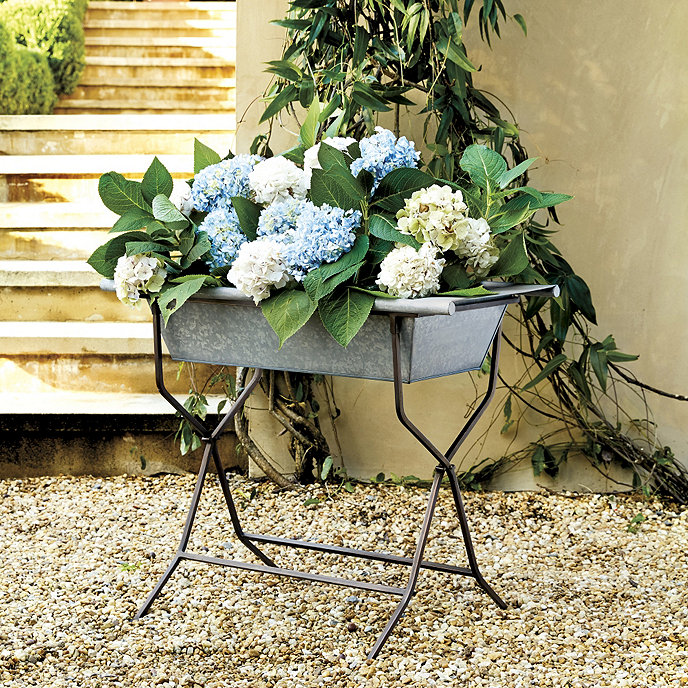
French Zinc Dough Bowl with Stand
Dough Bowl via Ballard Designs
Wherever and whatever you are planting this summer, hope you're having fun and staying cool.

 photo e0bcbc63-97e4-4f3b-adae-03bfc854ae09_zpsb8a65301.jpg

Wednesday, June 15, 2016

Easy Fix for Cardboard Magazine Files (Ikea Fluns Upgrade)

This post contains affiliate links, but all opinions are 100% mine.

So, back to the open shelving in my kitchen.  It vexes me.

I told you recently that I was gonna restyle it soon...and here's what it currently looks like:

I meant to get a plant up on that top shelf. before I shot this pic...whoops!
I also wanted to add some magazine files to corral all those catalogs, magazines, and papers that tend to clutter up my kitchen. Enter the Ikea FLUNS magazine files, which are white cardboard and will set you back a whole buck for four. FOUR FOR A DOLLAR???  Yep.  Great price, but unfortunately they look as cheap as they are:


If you don't have an IKEA near you, you can buy the exact same ones for a little bit more by clicking here.They are just so plain and so white, so I used craft paper and little label frames from the craft store (spray painted gold) to spruce them up and allow them to blend with my summer-y coastal blues and browns:


Spray adhesive worked great for this project.  If you want more of a tutorial, let me know!  By the way, my very favorite gold spray paint is Rustoleum Metallic Gold.


The categories are "Read" and "Plan:"


I did this quick project a few weeks ago and (in spite of being cardboard) the magazine files are holding up great!  This would be fun to do with a pretty patterned paper, too.  Let me know if you try it!

 photo e0bcbc63-97e4-4f3b-adae-03bfc854ae09_zpsb8a65301.jpg

Friday, March 25, 2016

Pokemon Birthday Party: Food, Craft and Game Ideas!

This post contains affiliate links.  For more information on my link policies, please see my Disclosures page.

Little Boo turned seven this week {wait, what?  Seven?  Surely that can't be right.}  One minute ago he was my tiny baby and now he's super big and throws Pokeballs everywhere.


To be honest, I was intimidated by the Pokemon theme, but his party turned out super fun...he was on cloud nine and loved every single thing.  Here's the scoop on our food, crafts and games!

Food Ideas
I kept the food pretty simple with a few fun twists.


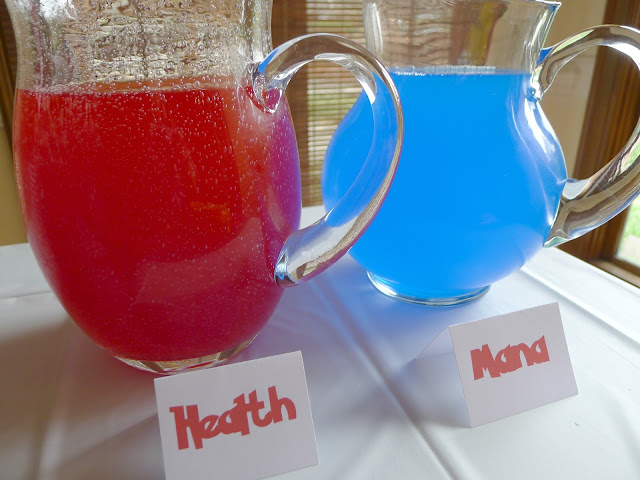
Our drinks were "Health" and "Mana" (red and blue Gatorade):


The most creative thing I did was turn Peeps into Pikachu (definitely grab those Peeps up now while they're in all the stores for Easter):


To make them I used food coloring markers similar to these.I wish I could have made the lines more precise, but the kids *adored* them.  Quick tip: you can make these many days in advance as long as you store them in an airtight container--the marker won't bleed over time.

I also made Jigglypuff Jello (watermelon was the closest I could get to pink):


And in a nod to actual health, served Voltorb Veggies:


Then immediately canceled out the health with Charmeleon Chips (aka Doritos):


For my son's cake I made a 4-layer cake with plenty of frosting, and used red and black sprinkles to make a Pokeball.  Because when it comes to baking I am all about simple.  Fondant and me are not friends.


Craft Ideas
The first activity the kids did was actually a craft!  I set up the dining room as a spot to make your own Pikachu Ears.  


I got this idea from Frog Prince Paperie (she has a template on her website for prepping your supplies). The kids had a lot of fun with this one.  


The cuteness!


Another craft I did for this party was to make our own Pokeballs:


I started with these ping pong balls,colored half of each with a red Sharpie, and then used my Silhouette to cut black vinyl into a rectangle shape with a circle. Feel free to contact me for the Silhouette file if you need it.  My son pointed out that the circle should have been hollow, so obviously they were SO NOT PERFECT but they worked!

What did we do with our Pokeballs?  I'm glad you asked!  Let's talk about our games!

Game Ideas
First off, after each activity or game I rewarded the kids with a Pokemon card or three (I bought a 50-pack on ebay for less than $10).  This kept them really motivated to do all the activities and I think made things fun.  As I said, the kids first made Pikachu Ears.  Then I had them each select a Pokemon (I bought this 24-pack from Amazon).  


Next, we had to train our Pokemon.  I had two activities: boring old Catch Charizard with a Pokeball (from Party City), which is exactly what you think it is.  But the other game, which I made up five seconds before the party started, was Toss Your Pokemon Closest to the Pokeball While Standing Behind a Line of Tape and See Who Gets Closest.  The kids *loved* this game so we played it three times.


While we ate a snack and cake, we played our "Psychic Challenge" which was to guess how many Pokeballs (there they are) were in the jar.


I love it that the youngest party guest won this game!  Then everyone got a Pokeball.  Now the kids had Pikachu Ears, a Pokemon, cards, and a Pokeball.  They definitely needed a place to keep all that stuff, so I sent them outside for the final game, "Gotta Catch 'em All," which was basically a quick little hunt for the party favors:


These plastic favor balls are from Party City, and look enough like Pokeballs that they go with the theme.  I thought it would have been fun to use electrical or washi tape around the center, but never got there.

All in all, it was a very fun party and also I learned so much about Pokemon that wow, I just never knew what I was missing;)  Have fun partying!

 photo e0bcbc63-97e4-4f3b-adae-03bfc854ae09_zpsb8a65301.jpg

Wednesday, January 20, 2016

Harry Potter Floating Candles Tutorial

This post may contain affiliate links, but all opinions are 100% mine.  For more information, please visit my Disclosures page.

As promised, here's the tutorial for my Great Hall floating candles for our Harry Potter party.

DIY Great Hall Floating Candles


Keyword here: sloppy.  They can be sloppy!  It's okay!  It will be dark(ish), they will be elevated, and everyone will love them even if they are a mess.  That was my approach and it worked out, so trust me on this.

The first step is to collect paper towel rolls for a few months or weeks, depending on how many candles you want.  Next, cut each paper towel roll in half--don't worry about being exact or even neat.

DIY Great Hall Floating Candles


Next, break out the hot glue and create drips around the top (the cut end) of the cardboard roll.  Just thickly apply hot glue, keeping the candle as straight up as possible so it drips nicely.

The next step is to spray them.  Again, sloppy was my mantra.  I laid it on thick and let it drip some, because, after all, these are drippy candles.  I used a matte white paint but I also think a dark color or black could be really cool.

DIY Great Hall Floating Candles

After spraying and allowing them to thoroughly dry, break out your hot glue again.  Now it's time to glue your battery-operated tealight candles into the top of the cardboard sleeve.  I used these lightsand liked them really well.

I glued them in on one side, and then reinforced on the other side with a generous dollop of glue. You will want to leave some openings for the fishing line later.

DIY Great Hall Floating Candles

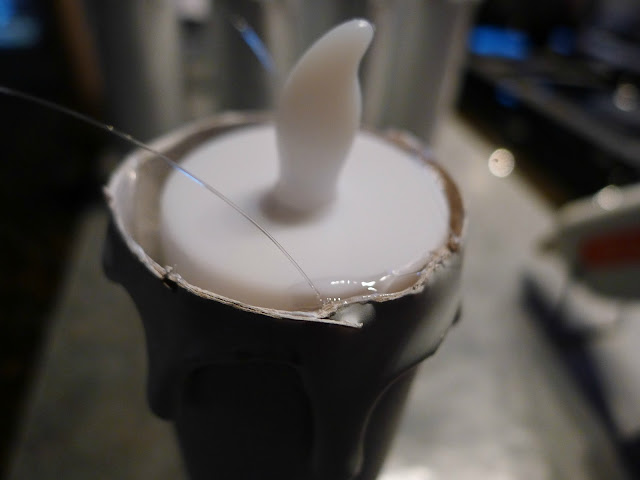
Once the tealights are in there, it's time to glue in your fishing line.  This is the most maddening step, but its not too hard. I pre-cut my line to about 5-6 feet each.  On each candle I dropped a big bead of glue into the cardboard sleeve on opposite sides, then inserted about 1/2" of each end of the fishing line, to create a clear loop about three feet long.

DIY Great Hall Floating Candles

I tried to make them on exactly opposite sides of the candle so they would hang straight, with varying success.  The glue held really well, though.

DIY Great Hall Floating Candles

Now you're ready to party!  I just used thumbtacks to hang them from our ceiling and it worked like a --ahem-- charm.  Have fun!

Follow on Bloglovin