This post contains affiliate links, but all opinions are 100% mine.
As promised!!! Last week I said I would show you my latest greatest paint project soon and today is the day! Don't feel like waiting? Okay fine let's jump right in:
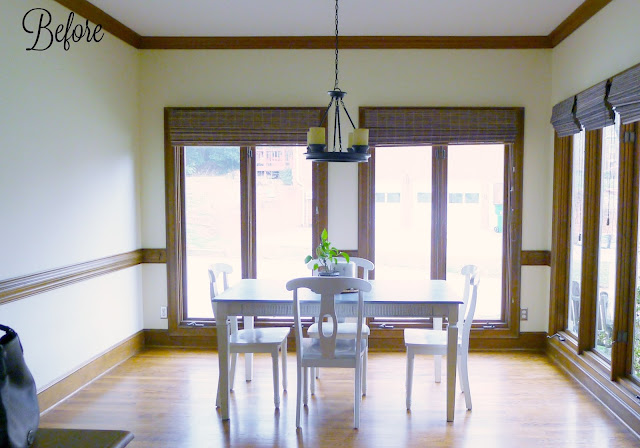
SO much better! Lighter! Brighter! I've never liked the wood trim in my kitchen. It has bugged me since Day One in this house (going on three years). So I painted it. And the walls. And I'm still not done but getting to this point is a major victory. I've literally been working on and off on this project for
nine months. As my husband said the other day, "sometimes...do you think
maybe...its better to pay a professional for some of these things...???" Yeah babe you are correct. My lower back agrees with you.
As you can see, I still haven't painted the trim around the widows. I can't decide whether to go all white, or white on the outside with black on the inner mullions. What would you do?
***BREAKING NEWS UPDATE***
Y'all. I am coming to you from the FUTURE to provide an update to this post. I don't even blog here anymore (these days, find me
right here), but I simply couldn't
not update you. It is now July, 2023--7 full
years after I asked what you'd do to these windows(!)--and I want to show you what we decided! I also want to encourage those who feel like making a home takes forever. Have patience...sometimes it does, and that is okay! That is real life for those of us not making a living as DIY bloggers or pros. So, here is what the breakfast nook looks like today:
In the last 7 years I have refinished the tabletop, purchased new chairs, painted the walls white and the ceiling gray, installed bistro-style shelving, replaced the light fixture, and worked with Marvin Windows to install these beautiful new sliders. These are the Marvin Infinity fiberglass windows in black.
How about another view of them?
By the way, working with Marvin Windows was an awesome experience. Every single person I met with the company was fantastic! And I am loving the final product. This isn't a paid endorsement, I just really like the company!
My whole goal was to create a little bistro for my family. I love the Serena & Lily Bistro chairs (of course) but I chose
these knock-offs and I am so happy I did):
And for anyone curious about other updates, here is the biggest additional change in this space:
Yes! I yanked up the carpet and refinished this entire staircase BY MYSELF in the summer of 2020. I was super cooped up and didn't have anything going on. This is one I am super proud of!
Sources for this update: Windows:
Marvin Windows; Chairs:
Amazon; Chandelier:
Amazon; Paint: Sedate Gray by Sherwin Williams (kitchen walls); White Dove by Benjamin Moore (trim and breakfast nook walls).
And now, I will return you to your regularly scheduled programming: this blog post from 7 years ago!
***THANK YOU***
I'd also like to either paint the doors or restore them to their original wood glory.
Similar question here--should I go all-white on the window trim? I need help, people.
I love this change. Remembers eons ago when I was asking you how in the world I should handle that awkwardly-placed light switch? This chalkboard wall is my solution!
I painted the wall, of course (and by the way made that frame myself with only a
little help), and then spray-painted a plain switch plate with chalkboard paint. Now the light switch is just integrated right in and even looks cute.
Yes, this is an actual rule in my house, although it applies mostly to foam swords and finger-guns.
The "mudroom" is mostly the same; I even re-cut the vinyl 'grateful' sign because we like it. As you can see, the trim around the stairs remains unpainted. I just plain lost my steam, people. Oh! Isn't that lamp adorable? It's from
World Market (affiliate link).
How about another view of that?
 |
| Angus at four months. |
 |
| Angus at nineteen months. |
And just because I love showing you some details...
Some of the items still on my list for the kitchen:
- Paint the stair spindles and risers.
- Paint the trim around the windows, as well as the doors.
- Install new light fixtures throughout.
- Install some kind of ceiling treatment.
- Install curtains in the breakfast nook.
Even with so much left to do I am enjoying this fresh look every single second I am in here, which is a whole hecka lot of seconds every day. Don't you love what some paint can do!?!

Sources:
Wall Paint: Sedate Gray (SW 6169) by Sherwin Williams
Trim Paint: Benjamin Moore White Dove color-matched by Behr
Baskets in Console: Ikea


