

Today I thought I would check in with ya and show you my latest fun little DIY, another Ballard Designs knock-off that even the most casual DIY diva could pull off. I originally wanted these suckers:
 |
| Photo: Ballard Designs |
But, since they range in price from $69-$169, well...that aint happening. So, I went and made me a couple:
 |
| Yes, I sipped wine and ate cashews as I shot these pics. Yes, it was 2:20 in the afternoon. Don't judge. |
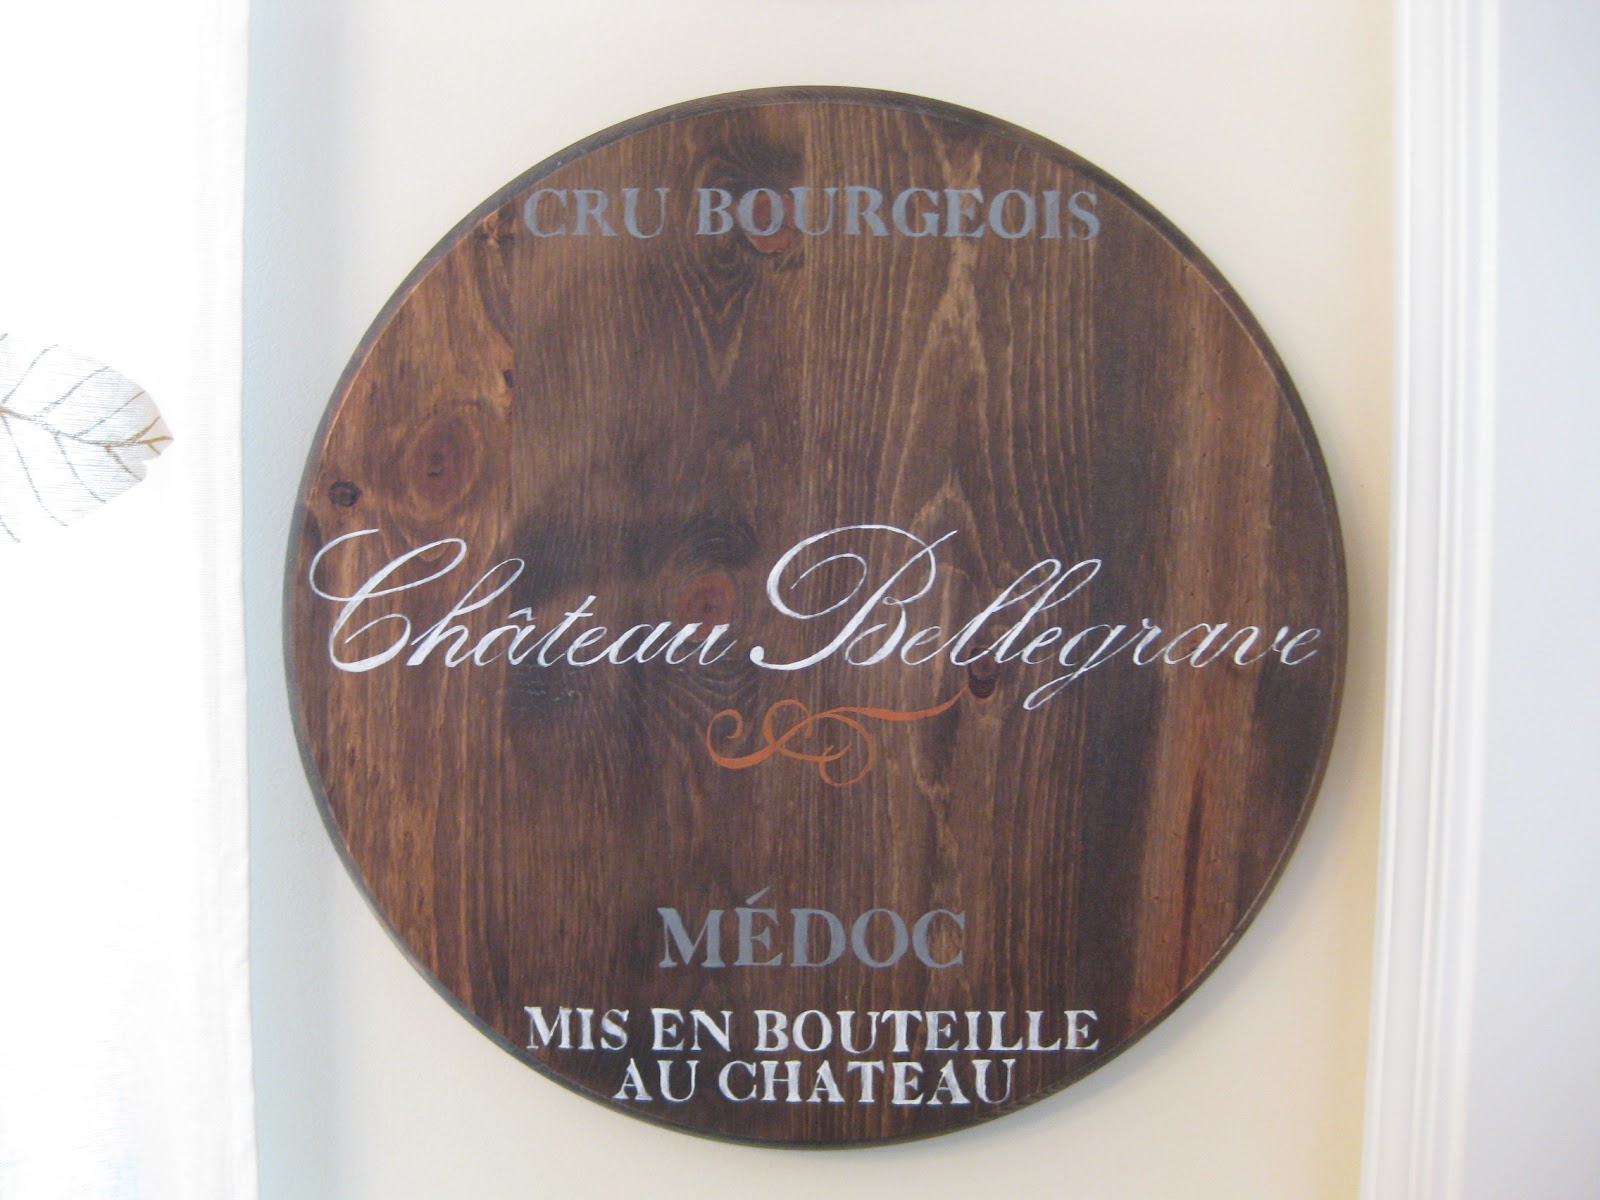

I used round Ponderosa pine panels from Lowe's which together cost me less than $20 (I bought the 15" and the 18" sizes). Then I stained and painted them to my heart's content. The smaller one I based closely on Ballard's design, using a basic stencil and substituting in my own numbers. The larger one I painted using this technique. It is based on this random picture I snapped of a wine crate in one of my favorite restaurants in Belgium:
 |
| (That's why I take pictures of everything!) |
Mine aint perfect. Let's just say they've got some hand-made personality.
Also, they are lacking that cute barrel-looking rim. Bummer.
Pros:
The lumber and the weathered gray stain I needed (I already had the other supplies) cost less than $25. That means I saved $165! Okay, I actually spent $25, but you feel me, right? For that, I can most definitely live with a little "personality" and lack of rims. I know you agree, that's why I love ya!

Yours look awesome. I like them without the rim, which I know in my house would just collect dust and/or serve as a tool for a certain little monkey to attempt to do chin-ups, probably resulting in a trip to the emergency room.
ReplyDeleteSo very cute! I want some ;)
ReplyDeleteWhat a great idea! Love them both!
ReplyDeleteThese are amazing, such an inspiration. I'm going to give this a try myself. Do they carry the round boards shown?
ReplyDeleteI found unfinished wine barrels on ebay. I am going to try the techniques and see what happens!! Thanks for the tips, yours turned out beautiful!!!
ReplyDeleteFor some reason I am only just now seeing your comment, so sorry! Hope your wine barrels turned out beautiful, would love to see them!
DeleteDrain the barrel completely and dry the wood. Make sure there are no pools of water left in the barrel, as these will interfere with the rest of the process.
ReplyDeleteLove how these came out!
ReplyDeleteThanks Danielle!
DeleteI wanted to let you know that I featured this today in my "What I Bookmarked This Week" post - stop by and check it out.
DeleteThanks so much! I've already added it to my "Mad Props";)
DeleteI prefer yours to the Ballard Design's ones! Awesome!
ReplyDeleteLori, thank you so much! That means a lot considering how much I saved on these:)
DeleteI like yours better than the Ballard ones too...they don't look so heavy. Beautiful.
ReplyDeleteDarlene, thank you! I actually agree and I am still enjoying them in my dining room.
DeleteMe too...like yours better. Well done!
ReplyDeleteThank you Penny!!!
DeleteI really like these. They are so unique. I would never have thought of putting wine barrel tops on my walls but they work. The are so inexpensive and look fun to make. Great post. It is going into my inspiration file.
ReplyDeleteThanks Angela! It were very fun to plan and make and I love having things I created myself in my home. If you do it yourself I would love to see the results!
DeleteHi Stacey! I don't remember the brands now, but I do know the gray one is "weathered gray" and the dark one is Walnut (probably Minwax). You will find that stain on bare wood dries really quickly. I probably only waited an hour or so to paint. Would love to see how yours turn out!
ReplyDeleteHi, can you tell me how you attached the plaques to the wall? I've made similar ones with the same wood from lowes but now I don't know how I'm going to attach them
ReplyDeleteHi Adrianna, thanks for your comment and sorry it took me a little while to reply; still recovering from a trip to Belgium! I just used sawtooth, nail-in picture hangers that you can find in the framing section of the craft store or at the hardware store. They are very easy to attach to the backs of wooden plaques using a hammer, and have held mine just fine. Good luck!
Deletethese are such an inspiration! you say you got the round panels from Lowes. Can I ask what size panels you used? thank you!
ReplyDeleteI used 15" and 18" diameter rounds. Have fun with your project!!!
Delete